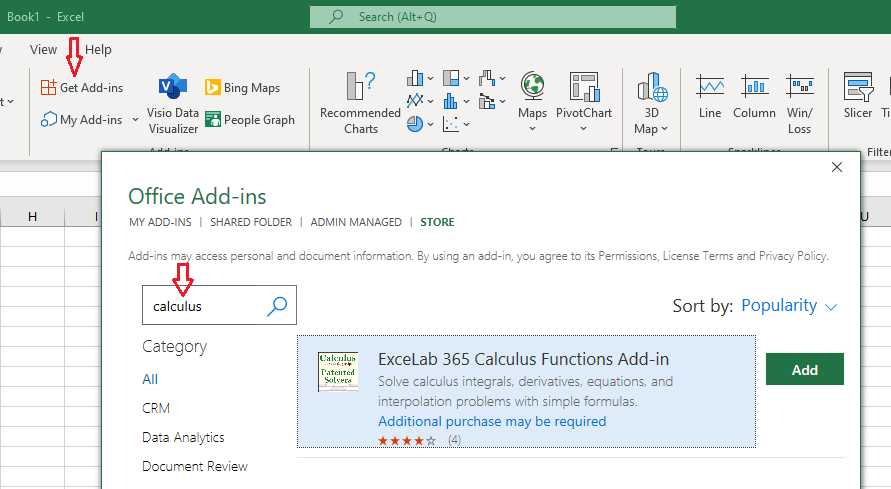
ExceLab Add-in Installation Help


ExceLab 365 on Windows PC or Apple Mac

  1. Start Excel. Select the Insert tab on the Ribbon then click Get Add-ins. This will open the Office Add-in store front. In the search box type calculus to locate ExceLab add-in.

  2. Click Add next to the add-in. This will enable ExceLab 365 in Excel and add the calculus functions control under the Formulas tab on the Ribbon

  3. Click on any cell and type in a simple integration formula like =QUADF(X1*X1,X1,0,1). You should get a #VALUE! error.

  4. Click on the cell with the #VALUE! error, then point at the error symbol to read the actual error message. In this example, you simply need to sign in to activate ExceLab 365 account.

  5. To Sign in, click Formulas → Calculus Functions → Account → Sign In.

    You must sign into ExceLab 365 with your active Office 365 subscription-linked email account. This can be your school email, work email or your personal email if it is linked to a Microsoft 365 account.
    To verify your Office 365 subscription, start Excel and click File → Account. Use the email listed in Belongs to: to sign into ExceLab 365.

To Remove ExceLab 365:

  1. Select the Insert tab on the Ribbon then click My Add-ins. This will open the Office Add-in store front showing a list of your installed add-ins

  2. Click on the three dots next to ExceLab add-in, then select Remove from the menue


ExceLab 7.0 on Windows PC

ExceLab 7.0 Add-in is distributed as a standard Windows installer package ExceLab.msi for 32bit and 64bit versions of Microsoft Office. To install ExceLab, just download then run the installer and provide your login/password at excel-works.com to activate your license.

The installer will automatically register ExceLab Add-in with your Excel application. Next time you start Excel, you can start using the solvers immediately.

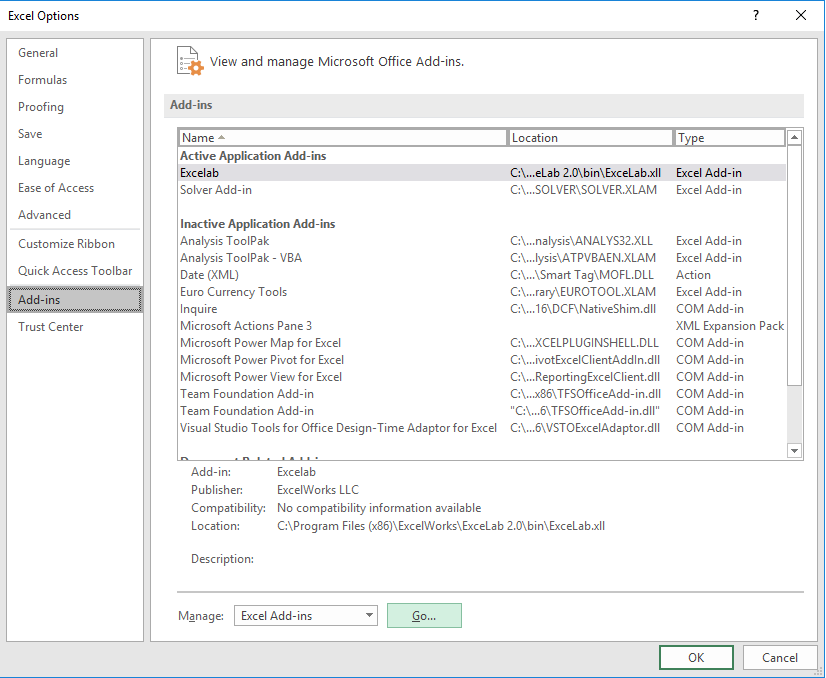
If you have multiple versions of Excel installed on your computer, the installer will register ExceLab with your default Excel version only. For other versions you will have to manually enable ExceLab.

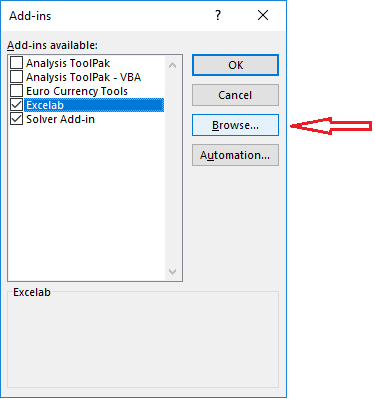
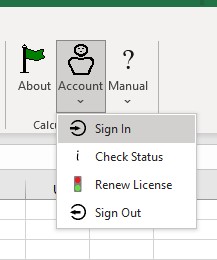
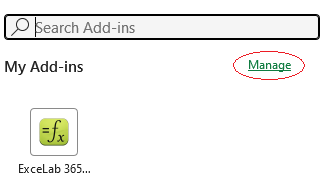
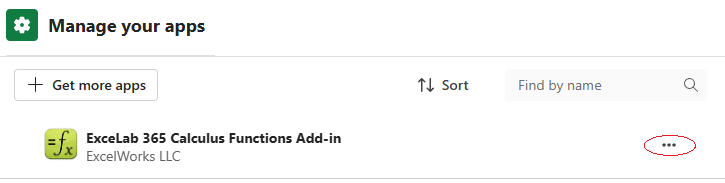
If for some reason, the installer completed successfully but you cannot find the solvers in your Excel, just enable ExceLab 7.0 manually as follows.

  1. Start Excel. From the Menu Tabs select File → Options.

  2. On Excel Options dialogue select Add-ins → Manage Excel Add-ins → click Go.

  3. If ExceLab is listed but unchecked, just check it and you are done!.

    if ExceLab is not listed listed, click Browse... and navigate to one of the following folders and select ExceLab.xll to enable the Add-in:

    32-bit Office
    C:\Program Files (x86)\ExcelWorks\ExceLab 7.0\bin
    64-bit Office
    C:\Program Files\ExcelWorks\ExceLab 7.0\bin

To temporarily disable ExceLab 7.0:

  1. Start Excel. From the Menu Tabs select File → Options.

  2. On Excel Options dialogue select Add-ins → Manage Excel Add-ins → click Go.

  3. If ExceLab is listed and checked, just uncheck it and you are done!. To re-enable, simply check the box again.

To uninstall ExceLab 7.0:

  1. From you Windows tool bar, search for Add or remove programs.

  2. Scroll down in the Apps & features window to locate Excelab. Click Uninstall to remove.

Question or Comment? Email us:
support @ excel-works.com

ExceLab: Transforming Excel into a Calculus Power House

ExceLab functions and methods are protected by USA Patents 10628634, 10114812, 9892108 and 9286286.

© 2015-2024, ExcelWorks LLC
Boston, USA